Friday, December 30, 2011
Carmelized Onion, Potato and Goat Cheese Tarts
Savory tarts are wonderful. You can make them in a wide range of sizes from bite-sized mini-tarts that make nice appetizers to large tarts that you cut in slices to serve. You can make them in any shape you like, and the topping combinations are endless.
The toppings I used for today's recipe include carmelized onions and potatoes. These ingredients require a little advance preparation, but once you have them (and your crust), it takes only a few minutes to assemble and bake the tarts.
Carmelized onions are super delicious and very versatile. In addition to these tarts, carmelized onions add great depth of flavor to many dishes. It takes an hour or so to properly carmelized onions, but you can do this step ahead. Cook up a big batch of carmelized onions and store them in your fridge. They'll keep for about a week. Mix them into mashed potatoes; add them to grilled cheese sandwiches; toss them into an omelet. You'll find myriad uses for them.
To carmelize onions: Peel and slice 2-5 onions thinly lengthwise. Melt 1-2 t butter per onion in a large, heavy skillet over low heat. Add the sliced onions and cook over low heat, stirring regularly, until the onions turn a deep brown color. Season with salt and pepper, if desired.
The potatoes I used in this tart were boiled ahead of time, chilled and sliced. It's easier to thinly slice a cold potato. You can cook up the potatoes when you're making this recipe, just allow them to cool before slicing them.
These tarts start with the same pie crust recipe I used last week. But you can use your favorite short pastry crust. I rolled out my crust to approximately 1/4" thickness and cut it with a round, fluted-edge form that's five inches in diameter. This size makes a great individual tart.
I like making flat tarts that I bake on cookie sheets, but you can make this recipe in a tart pan if you prefer. The flat tarts are a little easier, but be sure to let them cool before lifting them off the cookie sheet, as the pastry dough is delicate when it just comes out of the oven.
To make crust for six, five-inch diameter, round individual tarts: Take 7 T cold butter, cut into pieces, plus 1/2 T salt, and 1-1/3 C flour. Put all the ingredients in a large bowl. Using a pastry blender or a fork, cut the butter into the flour under it resembles coarse crumbs. Mix in a little ice water and continue to mix until the dough just comes together. Form into a flat disk and refrigerate for 10-30 minutes. You can refrigerate this dough longer, but it might be harder to roll if it's colder.
For six individual tarts:
Crust recipe above (or your favorite crust)
1-2 medium Russian Banana or Fingerling potatoes, boiled and cooled
1 C Carmelized onions, or more to taste
1/2 C crumbled goat cheese
1/2 C washed, dried, and finely sliced fresh arugula
1. Pre-heat oven to 400 degree F.
2. Roll out pastry dough 1/4" thick and cut six circles, each five inches in diameter.
3. Divide and spread the carmelized onions over each piece of dough.
4. Slice the potatoes thinly and arrange 2-3 slices over the onions on each tart.
5. Sprinkle a little crumbled goat cheese over each tart.
6. Bake in pre-heated, 400 degree oven for 10 minutes, or until the edges of the crust are golden.
7. Cool on cookie sheet for 5-10 minutes before lifting off with a metal spatula. Garnish with finely sliced arugula before serving.
Variations: Grated gruyere cheese is a nice alternative to goat cheese. Omnivores may like to add a little cooked and crumbled chorizo to these tarts.
Today's bounty included:
From Underwod Family Farms: Butter lettuce, rainbow chard, sugar snap peas, carrots, candy beets, mizuna, celery, and navel oranges.
From Weiser family Farms: Parsnips, mixed beets, and Russian Banana potatoes.
From Sage Mountain Farm: Salad mix, white and orange carrots, arugula, spaghetti squash, turnips, and Russian kale.
Urban farmer, Russell Wightman, provided the Fuerte avocados from Highland Park.
Happy New Year everyone!
Shelley
Friday, December 23, 2011
Butternut Squash Pie
Did you know you can make a "pumpkin pie" from butternut squash? In my opinion, butternut squash pie is even better than pumpkin pie because butternut squash is sweeter and creamier than pumpkin.
With a little bit of prep, which you can do in advance, you can make a delicious squash pie filling that you can pour into your favorite pie crust, homemade or store bought.
There are two ways to prepare the squash for a pie filling: bake it or boil it. To bake the squash, cut it in half lengthwise, scoop out the seeds, and place it cut side down on a lightly greased baking sheet in a 350 degree oven until soft, 45-75 minutes depending on the side of the squash. When it's cool enough to handle, scoop out the pulp and mash it, or puree it in a blender or food processor, or put it through a food mill or chinois, or use an immersion blender to turn it into a smooth puree.
To boil it: peel it and cut it into 1-inch chunks. Place the chunks in a saucepan with about 2 inches of water in the bottom. Bring to a boil and simmer, covered, until soft, about 15 minutes. Drain well and proceed as above to turn the chunks into a smooth puree. You can do this step in advance and keep the puree in your fridge for up to 3 days before making your pie.
Here's the pie recipe for a 9-inch diameter, 1-1/2 inch deep pie dish:
1-1/2 C pureed butternut squash
1 C evaporated milk
2 eggs
1/2 C brown sugar
1/4 C white sugar
2 t ground cinnamon
1 t ground ginger
1/4 t ground cloves
1/4 t ground nutmeg
1/4 t salt
1 pie crust (see recipe below if you don't have your own)
1. Mix the squash puree and the evaporated milk together until smooth and combined.
2. Beat the eggs and mix into the squash mixture until combined.
3. Mix in the sugar, spices, and salt and mix until well combined.
4. Pour into an unbaked pie shell and bake at 425 degrees for 15 minutes. Then turn down the heat to 350 degrees and bake until a knife inserted into the center of the pie comes out clean, about 45-55 minutes longer.
5. Allow pie to cool completely or refrigerate before serving.
Easy Pie Crust for a 9" Pie:
Cut 7 T of cold butter into cubes. Place 1-1/3 C flour and 1/2 t salt in a large bowl or in a food processor. Add the cold, cubed butter. Process or cut the butter into the flour with a pastry blender or 2 forks until the mixture resembles coarse crumbs. Process, or cut in, enough ice water until the mixture just comes together. Quickly form the crust into a flat disk and refrigerate for 10 minutes (or longer). Then roll out the crust on a pastry cloth and fit it into the pie dish.
Today's bounty included:
From Underwood Family Farms: lettuce, orange carrots, mizuna, Japanese turnips, purple kale, cilantro, French radishes, tatsoi, butternut squash, avocado, and arugula.
From Weiser Family Farms: German Butterball potatoes.
And from Rancho Santa Cecilia: Satsuma mandarins.
Happy Holidays Everyone!
Shelley
Friday, December 16, 2011
Maple Glazed Parsnips and Carrots
Parsnips are so sweet all by themselves you might think they wouldn't benefit from being glazed. But this simple and delicious recipe confirms the saying that too much of a good thing can be wonderful.
This recipe calls for a pound of parsnips and a pound of carrots, but you can cut the recipe in half or change the proportion of parsnips to carrots to suit your taste.
1 T vegetable oil
1 lb parsnips, peeled, trimmed and sliced into chunks
1 lb carrots, peeled, trimmed and sliced into chunks
1 C broth (chicken or vegetable) or water
1/2 C maple syrup
1 T rice vinegar
2 T butter
salt and pepper to taste
rosemary, optional
1. Heat oil in a non-reactive skillet with a lid over medium heat. Add chopped parsnips and carrots and cook, stirring occasionally until they begin to brown slightly, about 2-3 minutes.
2. Add the broth, syrup and vinegar. Bring to a boil. Turn down the heat and simmer, covered, until the vegetables are barely tender, about 10 minutes.
3. Uncover the pan and turn up the heat a little. Cook until the vegetables are tender and the liquid is like syrup, another 8-10 minutes.
4. Stir in the butter. Season with salt and peppper to taste. Add a little snipped fresh rosemary, if you'd like, or garnish with a sprig of rosemary. Serve.
Don't throw away those carrot and parsnip peels. Put them in the compost or make a quick broth from them.
Today's bounty included:
From Underwood Family Farms: Round carrots, red and green leaf lettuce, arugula, tatsoi, black kale, candy beets, French Breakfast radishes, celery, acorn squash, and butternut squash;
From Weiser Family Farms: Rustic cooking Nantes carrots, beets, parsnips, and Romanesco cauliflower;
From Sage Mountain Farm: Collard greens, Torpedo Baby Spring onions, New England pie pumpkin, and Red Gold potatoes;
From Rancho Santa Celicia: Satsuma mandarins and limes;
And from Drake Family Farms: Chevre.
Enjoy!
Shelley
Friday, December 9, 2011
Glacé Satsuma Mandarin Orange Segments
There's something perfectly delightful about gifts from the kitchen, and the holiday season offers many opportunities to make something wonderful and delicious for family and friends.
Today's recipe uses one of our favorite winter fruits, Satsuma mandarins, to make beautiful candied orange segments that taste like orange honey and will keep for months, if they're not eaten up before then.
Making glacé fruit takes a little time, most of which is simply allowing the fruit to soak. Whole fruit or pieces of fruit are soaked in a sugar syrup for several days until they become saturated. Each day you add a little more sugar to the syrup, increasing the concentration and allowing the fruit to soak up more syrup. Once the fruit is saturated, you let it dry for a day or two and that's it.
You can use practically any fruit. The amount of time needed to fully saturate the fruit will vary depending on the size of the pieces and the type of fruit. I allowed the mandarin orange segments to soak in the syrup for a total of 10 days, adding sugar each of the first six days then allowing them to soak in the syrup at room temperature for four more days. Then I dried them on a rack for two days.
This recipe calls for a little bit of dextrose, also known as brewer's sugar. Dextrose is an invert sugar, so called because its molecular structure is inverted as compared to glucose. What's important is that it prevents the sugar from crystallizing during the the multi-day process of making glacé fruit. You can get dextrose at a home brewing (beer-making) store. There's one in Eagle Rock.
This recipe calls for 1/2 lb. of mandarin segments, but you can double the recipe if you have more mandarins.
Glacé Satsuma Mandarin Orange Segments
1/2 lb peeled Satsuma mandarin oranges
1/2 C dextrose
2 to 2-1/4 C sugar
water
1. Carefully separate the peeled mandarins into segments and carefully remove as much of the pith and membrane as possible.
2. Place segments in a small to medium saucepan. Cover with plenty of water and bring to a gentle boil. Reduce to a simmer and gently cook for 5-10 minutes, until fruit is just barely cooked through and not falling apart. Drain and discard the water.
3. In the same pot, heat 1/2 C dextrose, 3/4 C sugar, and 3 C water over medium low heat until it comes to a boil, stirring occasionally and gently, only to combine. Reduce the heat and gently simmer for 10 minutes. Add the fruit to the hot syrup. Cook for 1 minute, until just heated through. Then remove from the heat and let stand overnight, uncovered, at room temperature.
4. The next day: Remove fruit from the syrup with a slotted spoon. Add 2-3 T sugar to the syrup and bring to a low boil. Reduce heat and simmer for 5 minutes. Then add fruit back to the syrup. Remove from the heat and let stand overnight, uncovered, at room temperature.
5. For the next 4-6 days, repeat step 4 until all the sugar is used or until the mandarin segments are fully saturated with sugar.
6. After the last addition of sugar, allow the mandarin segments to soak in the syrup for another 3-4 days. Then remove the segments from the syrup. Place them on a wire rack with a pan underneath to catch the drips and allow them to dry for 8 hours or overnight, preferably in a warm dry place.
Don't discard the syrup. It'll taste like orange honey. Put it on pancakes or waffles, or stir it into tea.
You can toss the glacéed segments in fine sugar after drying or dip them in tempered chocolate to create an extra special treat.
Today's bounty included:
From Underwood Family Farms: Green leaf lettuce, red chard, bok choy, arugula, yellow carrots, turnips, celery, Kabocha squash, parsley, and Beefsteak tomatoes;
From Sage Mountain Farm: Collard greens, Red Russian kale, Red Gold tomatoes, Cherry Belle radishes, and Spring Torpedo onions;
From Weiser Family Farms: Rustic Nantes carrots, parsnips, German Butterball potatoes, and Romanesco cauliflower;
From Rancho Santa Cecilia: Satsuma mandarins.
Enjoy!
Shelley
Friday, December 2, 2011
Braised Lamb with Carrots and Potatoes
Carrots, celery, and potatoes are mainstays of savory cooking, and this week's recipe uses them in a delicious braised lamb dish.
The lamb I used is local, from Tehachapi, and sustainably farmed. It was raised by Nancee Siebert, who I met through the Master Food Preserver training program. Nancee has been raising lambs since she was a little girl. The lambs are born early in the year, and Nancee starts selling them in late summer until they're gone.
I bought a whole lamb from Nancee and served the leg at Thanksgiving. It was some of the most delicious lamb I've eaten. Nancee raises her lambs with love and you can taste it. As of this blog post, Nancee still has a few lambs left, so if you're interested in one, you can contact me through Silver Lake Farms for more information.
If you don't want to use lamb in this dish, you can use beef or chicken instead. The cooking times may vary, but braise until fork tender.
Braised Lamb with Carrots and Potatoes
1 T olive oil
2-3 cloves garlic, sliced
4 lamb shoulder chops
salt and pepper
2 C water or stock
1 medium onion, peeled and chopped in 6-8 pieces
3 large carrots, peeled and chopped into chunks
1 rib celery, peeled and chopped into chunks
1 bay leaf
4-6 small potatoes, peeled
1 small celery root, peeled and chopped into 4-6 chunks
paprika
1. Heat the olive oil in a medium saute pan with a lid. Add the garlic and saute until aromatic and slightly golden.
2. Season the lamb chops with salt and pepper on both sides. Brown them on both sides in the pan with the garlic over medium heat.
3. Add the water or stock. Scatter the chopped onion, carrots, and celery in the pan. Add the bay leaf. Bring to a simmer over medium heat. Then turn the heat down and slowly simmer, covered, until the meat is just tender, about 1 to 1-1/2 hours.
4. Add the potatoes and celery root. Sprinkle them with a little paprika and continue braising until the celery root is tender, about another 30-45 minutes.
5. Do not allow all the liquid to cook off. Add a little more water or stock, if necessary. If you end up with too much liquid, uncover and reduce on a low simmer.
Don't Throw Away Those Veggie Scraps!
Waste not, want not is one of my mottos. Between the hens, the worms, and the compost, we don't have much food waste. Still, when I have the time, I like to make a vegetable broth from the peels and scraps of vegetables that I'm using for another purpose, and this braise provides just that tasty opportunty.
Be sure to scrub the vegetables well before peeling. Put all the peels and scraps in a medium saucepan. Add a bay leaf, some salt and a couple of peppercorns. Add 4 C of water and bring to a very low simmer. The secrets to a clear broth are do not stir and never let it boil. Simmer, barely bubbling, until reduced by half, about 45minutes. Cool and strain through a fine mesh strainer. Do not press the solids. Feed the remaining solids to the hens or the worms.
You can freeze this broth for use later. It's a good idea to cool it in the fridge before freezing.
This week's bounty came from four farms:
From Underwood Family Farms: White cauliflower, tatsoi, mizuna, broccoli, Celebrity tomatoes, romaine, carrots, French Breakfast radishes, celery root, and artichokes;
From Weiser family Farms: Potatoes, carrots, Watermelon radishes, rutabagas, and beets;
From Sage Mountain Farm: Spaghetti squash, green heirloom tomatoes, arugula, and collard greens; and
From Rancho Santa Cecilia: Satsuma mandarins and limes.
Enjoy!
Shelley
pictured here are scraps ready for making broth, and below, the broth itself. Delicious!
Friday, November 25, 2011
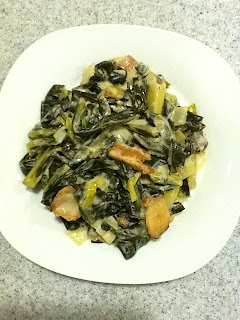
Creamed Collards
I hope everyone had a delightful Thanksgiving feasting with family and friends. I'm still in a thrall over the myriad tastes and treats that were part of my Thanksgiving meal.
My dear friend, John Barrentine, is the best non-professional cook I know. He made a collard dish that was so luxuriously delicious; when I saw collards in today's box, I knew I had to share this recipe.
Turns out, it's a recipe that appeared in this month's issue of Bon Appetit. Of course, John enhanced it a little with a few additions of his own. I'm not sure there is any higher calling for collards than this luscious and creamy dish.
1 bunch collard greens, center stems removed and cut into 1/2" strips
1/4 C cider vinegar
1 t vegetable oil
1/2 C thick-cut smoked bacon, cut into 1/3# pieces
1 shallot, finely chopped
1 leek, finely chopped
1 T + 1 t flour
1 t smoked paprika (or to taste)
3/4 C whole milk
3/4 C heavy cream
salt and pepper
1. Blanch the chopped collards in a large pot of boiling salted water with 1/4 C cider vinegar until bright green and beginning to soften, about 3-4 minutes.
2. Heat the oil in a large pot over medium heat. Add the chopped bacon and cook untiol crisp. Transfer the bacon to a paper towel, reserving the rendered bacon fat.
3. Remove all but 1 T bacon fat and save the rest for another use.
4. Over medium heat, add the chopped shallot and leek to the bacon fat and cook until soft, about 5 minutes.
5. Add the flour and the smoked paprika. Stir constantly for 2 minutes.
6. Whisk in the milk and cream and bring to a soft boil, whisking often.
7. Stir in the blanched greens. Reduce the heat to a simmer and cook, stirring often, until the greens are tender and the sauce thickens, about 30 minutes.
8. Season with salt and lots of pepper. Garnish with the bacon before serving.
Vegetarians may omit the bacon and use vegetable oil instead.
Today's bounty included:
From Underwood Family Farms: colored cauliflower, red leaf lettuce, orange carrots, Easter radishes, spinach, red bell pepper, celery, Satsuma tangerines, and Fuji apples;
From Sage Mountain Farms: baby Torpedo spring onions, collard greens, and acorn squash;
And from Silver Lake Farms: fresh herbs.
Enjoy!
Shelley
Friday, November 18, 2011
Spiced Butternut Squash with Apples
Thanksgiving is coming. It's next week. If you haven't already done so, it's time to start planning your Thanksgiving table. Here's a super easy and delicious alternative to candied sweet potatoes that uses two fall favorites: butternut squash and apples.
1 butternut squash
3-4 apples
1/2 C brown sugar
1 T flour
1/2 t salt, or to taste
1/2 t cinnamon
1/2 t nutmeg
4 T cold butter + extra to butter the pan
1. Preheat oven to 350 F degrees. Butter a 2-3 qt baking dish and set aside.
2. Cut the squash in half lengthwise. Scoop out the seeds and put them in the compost, or feed them to the chickens. Peel and slice the squash crosswise into 1/4-inch slices. Put in a large bowl
3. Cut the apples in quarters lengthwise. Remove the cores and peel. Compost the peels and cores. Cut each quarter into 3 or 4 slices lengthwise. Add to the bowl. Stir the apples and squash to evenly distribute.
4. In a separate small bowl, mix together the brown sugar, flour, salt and spices until well combined.
5. Chop the cold butter into 6-8 pieces and cut the butter into the sugar and spice mixture with a folk or pastry blender until the mixture resembles coarse crumbles.
6. Pour the peeled and sliced squash and apples into the buttered baking dish. Sprinkle the crumb mixture on top. Cover tightly with foil. Bake at 350 F for 60 minutes or until squash is tender. Remove the foil carefully as steam has built up inside and cool at least 2-3 minutes before serving.
This dish makes its own lovely sweet sauce. In fact, this dish is so sweet you might want to serve it for dessert. No kidding. Serve it hot with vanilla or cinnamon ice cream; or serve room temperature or cold with a dollop of whipped cream.
It was a wow week at the CSA. What a bounty! Today's box included:
From Underwood Family Farms: iceberg lettuce, romaine lettuce, purple kale, fennel, red beets, French Breakfast radishes, purple carrots, mizuna, bok choy, Napa cabbage, kohlrabi, and butternut squash;
From Sage Mountain Farm: collard greens, summer squash, arugula, winter squash, and green heirloom tomatoes;
From Weiser Family Farms: golden beets, watermelon radishes, orange carrots, German Butterball potatoes, DeCiccio broccoli, dried Dragon Tongue beans, and purple cauliflower;
From Rancho Santa Cecilia: Hass avocados and Satsuma mandarins;
And from Silver Lake Farms: bunch fresh herbs; Meyer lemons and Swiss Chard from the Dempsey's Tin House Farm.
Plus extras: Thai Guavas and some sapote. Thank you Shareholder Brian for picking and sharing from your trees.
If you're wondering what to do with kohlrabi, check out the blog post from March 19, 2010 on Minty Kohlrabi Slaw.
Enjoy! Happy Thanksgiving to All!
Shelley
Purple caulis from Weiser Family Farm, and pictured below that, Shareholder Brian's Thai Guavas
Friday, November 11, 2011
Roasted Cauliflower Dip
I love cauliflower and I'm always looking for new and interesting ways to prepare it. This dip is my adaptation of a recipe I saw on the Food & Wine website. The recipe calls for slicing and roasting the cauliflower with ginger, salt and coriander. The roasted cauliflower was so delicious when I took it out of the oven, it would make a wonderful dish just like that. So if you're looking for a hot cauliflower side dish, just follow this recipe until you take the cauliflower out of the oven.
Making the dip requires just a few more steps, but you'll be rewarded with a delicious and distinctively different dip.
1 large cauliflower
3-4 T vegetable oil
2 T grated fresh ginger
1 T ground coriander
salt and pepper to taste
3-4 tahini (sesame paste)
3 T fresh-squezed lemon juice
3 T toasted sesame seeds, or to taste
1/4 C plain yogurt
finely chopped fresh cilantro to taste
1. Preheat oven to 425 degrees.
2. Trim the leaves and tough stem off the cauliflower and compost them.
3. Cut the caulflower in half and cut each half into 1/2" slices. Place the sliced cauliflower in a large bowl. Toss with the oil, ginger, coriander, salt, and pepper.
4. Spread the cauliflower on a baking sheet and roast until tender and lightly browned in spots. [Stop here for a wonderful side dish.] Remove from the oven and cool slightly.
5. Transfer the cooled cauliflower to a food processor and process to a chucky puree. Add the tahini and lemon juice and process until just incorporated.
6. Transfer mixture to a bowl. Stir in the yogurt, sesame seeds, and cilantro. Adjust the salt, if necessary. Chill before serving. This dip is great with pita chips.
My New Frontier Family Farm chicken is roasting in my oven right now and the aroma is delicious. It was a beautiful bird to prepare; lovely taut skin, pretty pink color, and a very fresh smell. I simply rubbed my bird with olive oil, seasoned it with lots of salt and pepper and some smashed fresh garlic. I cut up half a lemon and stuffed it in its cavity, and I sliced half a brown onion and scatter the slices inside and outside the bird. I can't wait to eat it.
Today's bounty included:
From Underwood Family Farms: Artichokes, acorn squash, green leaf lettuce, broccoflower, cauliflower, Japanese turnips, red bell pepper, yellow carrots, and Fuyu persimmons.
From Weiser Family Farms: white carrots, beets, German Butterball potatoes, and Dragon Tongue beans.
From Sage Mountain Farm: arugula, summer squash, Red Kuri squash, spaghetti squash, and collard greens.
And from Rancho Santa Cecilia: Hachiya persimmons and Satsuma mandarins.
Enjoy!
Shelley
Friday, November 4, 2011
Green Bean Casserole
Thanksgiving is less than three weeks away; and if you're thinking about how you might make green bean casserole - that Thanksgiving staple - healthier and fresher, then today's recipe is for you.
Green bean casserole is a traditional dish on many Thanksgiving tables. It's usually made with canned or frozen string beans, cream of mushroom soup, and canned fried onions. With just a little extra effort, you can made a healthier version from scratch with all of the creamy delicious-ness of original version.
Start with the Blue Lake string beans in today's CSA box, add fresh mushrooms, make a quick cream sauce, and use fresh, sliced onions to make your own tastier and healthier fried onions. And since you're starting from scratch, you can adjust the ingredients to your taste.
Prep the Beans: Trim the string beans and cut them into bite-sized pieces if you wish. Blanch them in a pot of boiling water or steam them for about 2-3 minutes, or until tender. Drain and set aside.
Thinly slice fresh mushrooms and saute them in a little bit of butter or olive oil. I like to throw in some sliced shiitake mushrooms for added flavor. Covering the mushrooms while they're sauteing over low to medium heat will prevent them from sticking to the pan, as the water they exude will not evaporate. Once the mushrooms are cooked, remove the cover and cook off the liquid, or pour it off and set it aside to use in your sauce.
I'm being vague about the amounts of beans and mushrooms on purpose. I tend to go heavy on the mushrooms, but you can adjust the proportion of beans to mushrooms to suit your taste. The amount of sauce you need depends on the volume of cooked beans and mushrooms combined. For a 1 qt casserole, you'll need 4 C of cooked beans and mushrooms. For a 2 qt casserole, you'll need 8 C.
While the beans and mushrooms are cooking, make the crispy fried onions by slicing 1 large onion in quarters lengthwise, then very thinly slice each quarter crosswise. In a large skillet, heat 1-2 t olive oil over medium high heat. Add the onions and stir to break apart the rings. Use a skillet that's large enough for the onions to be spread thinly on the bottom or work in batches. Cook the onions until they get crispy and brown, stirring occasionally. Set aside.
You need about 2 C of white sauce for a 1 qt casserole or 4 C of white sauce for a 2 qt casserole. Make your favorite white sauce or use this simple recipe:
Melt 2 T butter over medium low heat in a small saucepan. Stir in 2 T flour, 1 T at a time, and cook, stirring constantly for 1 minute. Whisk in 2 C hot milk, 1/2 C at a time, whisking constantly to prevent lumps and sticking. Add salt and pepper to taste. A little nutmeg is also good. Cook over medium low heat, whisking constantly until the sauce just starts to boil. Remove from the heat. Double this recipe for a 2 qt casserole.
Canned condensed milk makes a particularly creamy sauce. Whole milk is also good.
Now you can assemble the casserole: Put the beans and mushrooms in a large bowl. Pour the white sauce over them and stir to coat. Adjust the seasoning, if necessary and pour into a greased casserole dish. Spread your crispy fried onions on top and bake in a preheated 375 F degree oven for 20-30 minutes until the sauce is bubbling and the top is brown. Let sit for 5 minutes before serving.
You can blanch and freeze the Blue Lake beans you got in today's box to use on Thanksgiving. You can prepare the different elements of this recipe the day before Thanksgiving. Defrost the beans, cook up the mushrooms, stir them together and store them in the refrigerator. Make the crispy fried onions and the white sauce. You can leave the onions in a covered container on the counter but refrigerate the white sauce. On Thanksgiving day, follow the steps in the paragraph above on assembling the casserole. You may have to cook it a little longer if all the ingredients are cold when you put it in the oven.
Today's bounty included:
From Underwood Family Farms: Tatsoi, bok choy, celery, Blue Lake beans, red leaf lettuce, fennel, French Breakfast radishes, summer squash, bi-color corn, kale, arugula, broccoli, and Cherokee tomatoes
From Weiser Family Farms: Kabocha squash, golden beets, German Butterball potatoes, and dried Dragon Tongue beans
From Rancho Santa Cecilia: Hass avocados, limes and Satsuma mandarins
From Silver Lake Farms: arugula, basil, and cilantro microgreens and thyme
Enjoy!
Shelley
Friday, October 28, 2011
Butternut Squash and Mixed Bean Salad
Butternut squash is a beautiful and delicious vegetable. With bright orange flesh, a lighty starchy texture, and remarkably sweet flavor, this great fall vegetable can be used in so many ways. Butternut squash is a terrific roasting vegetable. Just cut in half lengthwise, scoop out the seeds, brush the cut side with oil, and roast, cut side down, on a baking sheet at 350 F until tender.
From here you can scoop the pulp out of its skin and mash it with a little butter for a side dish that's particularly tasty with roast pork or fowl. Roasted butternut squash makes a rich and flavorful soup (see recipe from October 15, 2010). I like to peel, seed, and slice butternut squash before throwing it into a stir-fry.
For today's recipe, butternut squash is peeled, seeded, cubed and roasted until tender before tossing into a salad of mixed legumes. Cubed and roasted butternut squash is a lovely side dish all by itself. However, you can take these golden morsels and mix them with a variety of vegetables to make many wonderful combinations.
I used kidney beans, edamame, and garbanzo beans, but you can use whatever combination of legumes you like. I tossed the roasted squash cubes with the beans and added chopped red onion, green onion, parsley, and fennel. I made a light vinaigrette and tossed in some finely grated orange peel to jazz it up.
Here's the recipe:
2 C peeled and cubed butternut squash, approx 3/4" cubes
2 C kidney beans, canned or prepared from dry beans
2 C shelled edamame, prepared per directions
2 C garbanzo beans, canned or prepared from dry beans
1/4 C finely chopped red onion
2-3 green onions, finely chopped
1/2 C very finely sliced fresh fennel (or more to taste)
salt and pepper to taste
3-4 T olive oil
3-4 T rice vinegar
1 t finely grated orange rind
1-2 T fresh squeezed orange juice (optional)
1. To prepare the squash: Cut in half lengthwise, scoop out and compost the seeds, cut crosswise into 3/4" slices, trim off the peel and cut slices into 3/4" cubes to make 2 C. Toss with a little olive oil. Sprinkle on a little salt. Roast in a pre-heated 350 degree oven until just tender, about 30 minutes. Set aside to cool.
2. If you're using dried beans, prepare them according to directions (usually soaking overnight and boiling for about an hour) before measuring them and proceeding with this recipe. Canned beans are fine for this recipe. Rinse them before adding them to the bowl.
3. Toss the cooled squash cubes together with the kidney beans, edamame, and garbanzos in a large bowl. Stir in the red onion, green onions, and fennel. Season with salt and pepper to taste.
4. In a separate small bowl, whisk together the oil and vinegar until combined. Pour over the salad. Add the grated orange rind and juice and toss until all the vegetables are coated with the dressing. Adjust the seasoning. Chill until you're ready to serve.
This recipe makes a lot of salad. You can cut the amounts in half to make a smaller salad.
Even if you make the full recipe of this salad, you're likely to have some unused butternut squash leftover. If you're feeling a little adventurous, you might consider making Sweet Winter Squash Pickles and canning them, like I did in my Master Food Preserver course last Tuesday evening.
Since September, I've been enrolled in a 12-week Master Food Preserver training program through the University of California Cooperative Extension; and I'm having a great time! We've been learning all kinds of food preservation methods, including canning, pressure canning, pickling, drying, fermenting, cheese-making and we haven't even gotten to freezing and charcuterie yet.
If you're familiar with hot water bath canning, you should have no trouble following this recipe. You'll also need more butternut squash, but that's easy to come by at this time of year. Just check out your local farmer's market. If you don't have a canner, you can still make the pickles, but you'll have to keep them in the fridge as opposed to on the shelf.
Sweet Winter Squash Pickles
2 cinnamon sticks
12 whole allspice berries
10 whole cloves
zest and juice of 1 lemon
6 C granulated sugar
4 C distilled vinegar
24 C peeled, seeded, and cubed butternut squash (3/4" cubes)
Yield: About six 16-oz jars
1. Prepare a sachet with the cinnamon sticks, allspice and cloves. Set aside.
2. In a large stainless steel saucepan, combine the vinegar, lemon juice, zest, sugar and spice sachet. Bring to a boil over medium heat, stirring occasionally. Cover, reduce heat and simmer for 10 minutes. Add the squash, return to a boil and cook for 3 minutes. Discard spice bag.
3. Meanwhile, prepare the canner and jars. Fill the canner about 2/3 full with water and bring to a boil. Prepare another pan or kettle with hot water in case it's needed to cover the jars once they're in the canner. Wash the canning jars, lids, and rings well in hot water. Make sure there are no chips or cracks on the jars. Keep warm.
4. Pack the hot squash into hot jars, leaving a generous 1/2" of headspace. Ladle the hot syrup into the jars leaving 1/2" headspace. Remove the air bubbles and adjust headspace if necessary. Wipe the rims of the jars. Center the lids on the jars. Screw down the band to fingertip-tight.
5. Place the jars in the canner. Ensure they are completely covered with water. Add water to the canner if necessary. Bring to a boil and process for 20 minutes. Wait 5 minutes, then remove the jars, cool, wipe clean, label, and store.
Today's bounty included:
From Underwood Family Farms: green cabbage, white cauliflower, artichokes, butternut squash, butter lettuce, romaine, mizuna, spinach, Celebrity tomatoes, easter radishes, yellow bell peppers, and Hachiya persimmons.
From Sage Mountain Farm: Fingerling potatoes, summer squash, and pie-making pumpkin.
From Weiser Family Farms: rutabagas (yum!).
From Rancho Santa Cecilia: avocados and Satsuma mandarins.
And from Silver Lake Farms: arugula, basil, and cilantro micro-greens.
Enjoy!
Shelley
Friday, October 21, 2011
Acorn Squash Ravioli
Making ravioli at home is a fun activity that you can do with friends, or with children, or on a rainy afternoon. It's actually pretty easy, especially if you buy fresh pasta sheets. Bristol Farms carries fresh pasta sheets, as do several other stores around town. For the more adventurous cook, I've provided a recipe for making your own pasta below.
For the filling:
1 acorn squash
freshly grated salt, white pepper and nutmeg to taste
1. Preheat oven to 350 F.
2. Cut the squash in half lengthwise. Scoop out the seeds. Compost them or put them in the green trash bin. Place the squash halves cut side down on a lightly greased cookie sheet and bake until soft, 45-60 minutes.
3. Remove from the oven and cool. Scoop the cooked squash into a bowl. Compost the skins or put it in the green bin.
4. Mash the squash until smooth. Season with salt, white pepper, and nutmeg to taste. Mixture should be thick.
5. Preparing the filling can be done in advance. Refrigerate the filling to use within 3-5 days, otherwise, freeze the filling until ready to use. If frozen, defrost the filling before proceeding with this recipe.
One medium acorn squash will produce a fair amount of filling. You can freeze any leftovers or turn the leftover filling into a soup by thinning it with broth.
Assemble the ravioli:
4 sheets fresh semolina pasta
Prepared filling
1. Using a hand-crank pasta machine or a rolling pin, roll the pasta to desired thickness (or thinness). [Most fresh pasta sheets are intended for lasagna or to be cut into noodles. Since ravioli has 2 layers of pasta, I like to roll it thinner, but this is a matter of preference.]
2. Starting with a sheet of pasta that's about 3-4" wide, place spoons of prepared filling down the midline of the pasta sheet, spacing them about 3" apart. Leave an inch at the top, the bottom, and on either side of the spoons of filling.
3. Fold the pasta sheet lengthwise so that the 2 long sides come together. Press down in between the filling so that the dough sticks together. Squeeze out any air so that the filling is well encapsulated. If you're having trouble getting the pasta to stick together, it helps to dip your finger in water and run it where the pasta comes together.
4. Using a knife or a pasta cutter, cut between each spoon of filling leaving enough dough on either side to create a generous edge of pasta. You can cut each piece into half-moons to give the ravioli a decorative shape.
Alternatively, you cut your pasta sheets into 3" wide lengths. Place spoons of filling 3" apart down one sheet, then cover with another sheet and cut.
5. At this point, you can freeze the ravioli for later use. To do this, arrange the ravioli in a single layer on a baking sheet and place in the freezer. Once frozen, you can pack the ravioli in a plastic freezer bag or a freezer container.
Frozen ravioli can go right from the freezer into a pot of boiling water. In fact, you don't want to defrost them, as they might stick together.
6. To cook: Bring a pot of water to a boil. Gently add the ravioli. Cook in boiling water for 2-3 minutes, or until done.
Sauces:
Acorn squash ravioli are delicious with a creamy tomato sauce. If you have any delicious home-made sauce like the Slow Cooked Tomato Sauce from Septmber 24, 2010, heat it up and stir in a little cream before saucing the ravioli.
I like to make a simple sauce using melted and lightly browned butter, ground toasted walnuts, and sage.
Omnivores might enjoy these ravioli with a classic Bolognese sauce. Whatever you decide to do, these ravioli are delicious and keep well in the freezer, so make extra to enjoy at another meal.
To make your own pasta:
Making your own pasta isn't hard, but an experienced hand produces a better result. Here's an easy recipe you can play with, if you'd like:
3/4 C unbleached all-purpose flour
1 large egg at room temperature
In a large bowl or on the kitchen counter, mound the flour and make a well in the center. Break the egg into the center of the well and begin to "scramble" the egg, incorporating a little bit of flour at a time as you continue to stir the egg with a circular motion, adding more and more flour as your go. Once the mixture holds together, you can use your hands to incorporate the flour. Knead the dough for 6-7 minutes, incorporating as much of the flour as possible. The dough will have a shiny appearance when properly kneaded. Wrap it in plastic wrap and let it rest on the counter for 30 minutes.
After 30 minutes, unwrap the dough. Pat or roll into an oblong disc. then roll into a thin sheet with a pasta machine. You may want to cut this dough in half before rolling it with the pasta machine in order to make it more manageable.
Some people prefer to use fancy durum wheat or semolina instead of all-purpose flour. These flours are wonderful and produce a more toothsome pasta, but they are also more difficult to work with.
Today's bounty included:
From Underwood Family Farms: green leaf lettuce, green bell pepper, broccoli, Cherokee heirloom tomato, golden beets, rainbow chard, Sugar Baby pumpkin, fennel, and Acorn squash.
From Weiser Family Farms: celery root.
From Rancho Santa Cecilia: mandarins.
And from Silver Lake Farms: arugula and mustard microgreens.
Enjoy!
Shelley
Friday, October 14, 2011
Risi e Bisi
Fresh peas are one of spring and fall's true delicacies. They have such a short season, you have to snatch them up as soon as they're available, because in a few weeks, they'll be gone.
Risi e Bisi, or rice and peas, is a classic Italian dish. It's a cross between risotto and a thick soup. To get the right consistency, you have to use a short grain rice. Arborio rice, or one of its cousins, like Carnaroli, is best.
You can use either home-made or store-bought chicken broth or vegetable broth. You can make a vegetable broth from the pea pods if you don't mind this extra step. Place the empty pods (after you've shelled the peas) in a stock pot. Add 2 carrots, 2 ribs celery, 1 small onion, 1/2-1 t salt, a few peppercorns, a bay leaf, and 6 C cold water. Heat it to almost boiling. Turn down the heat and simmer slowly for about 45 minutes. Cool slightly. Then strain and discard the spent vegetables.
Risi E Bisi
2 T butter
1/4 C finely chopped onion
1 C Arborio rice
3-4 C broth
1 C shelled fresh peas
salt and pepper to taste
1/4 C freshly grated parmesan cheese
chopped fresh parsley for a garnish
1. In a medium to large stock pot, melt 2 T butter. Add the onion and saute until barely translucent.
2. Add the rice and stir to coat with the butter.
3. Stir in 1 C broth. Add the shelled peas. Continue stirring until the broth is nearly all absorbed.
4. Stir in remaining broth 1/2-1 C at a time, waiting until the broth is nearly absorbed before adding the next cup.
5. Continue stirring in broth until the rice and peas are tender and the dish is creamy or even a little soupy.
6. Remove from the heat. Stir in the parmesan cheese. Season with salt and pepper to taste. Pour into bowls and garnish with finely chopped fresh parsley to serve.
Some recipes for Risi e Bisi call for a little chopped pancetta Omnivores may enjoy this tasty addition. You can add the chopped pancetta at the beginning when you're sauteing the onions in the butter.
Some folks like to garnish Risi e Bisi with finely chopped basil instead of parsley. Try it if you have some nice fresh basil.
Today's bounty included:
From Underwood Family Farms: Romaine lettuce, summer squash, leeks, sugar snap peas, bi-color corn, artichokes, jalapeno, and Sharlyn melon.
From Rancho Santa Cecilia: limes, mandarins, and Hass avocados.
And from Silver Lake Farms: mustard and arugula microgreens.
Enjoy!
Shelley
Friday, October 7, 2011
Mixed Squash Galette
A galette is like a pie or tart only not as fancy. Most people think of galettes as dessert, but they can just as easily be made with savory ingredients like the one I made today.
I love that there's no wasted dough with a galette, and you can made it whatever shape you like. You just roll out the dough, arrange the filling, fold up the sides, and bake. Also, you can put almost anything you want inside, so long as it isn't too wet. So it's a great vehicle for creativity in the kitchen.
You can use any pie crust dough recipe you're comfortable with or you can buy an unbaked, frozen crust. You can even substitute filo dough and produce a similar product.
For my galette, I used slices of zucchini, butternut squash, onion, and tomato, as well as two leaves of kale. I sauteed all of the vegetables, except the tomato, to soften them a little. However, with the exception of the kale, this step is not necessary if you like your vegetables crunchy.
For the crust:
1-1/2 C flour
1 t salt
1 stick very cold butter, cut into small pieces
3-4 T ice water
1. Place the flour and salt in the work bowl of a food processor and process for 1-2 seconds until combined.
2. Add the butter and process until the butter is evenly distributed in small pebbles throughout the flour.
3. Add 2-3 T ice water and process just until the dough will hold together. Test this by pinching a small amount of dough between your fingers. If it sticks together, it's been processed enough. If not, process in a little more ice water and test again.
4. Turn dough out onto a floured surface and press the dough together. Wrap and refrigerate until you're ready to fill the galette.
For the galette:
1-2 T olive oil
1-2 medium zucchini, sliced in 1/4" slices
1/3 medium butternut squash, peeled, seeded, and sliced in 1/4" slices
1 medium onion, sliced crosswise in 1/4" slices
2-3 leaves kale, sliced crosswise 1/4-1/2"
1 large tomato, cut crosswise in 1/4" slices
salt and pepper to taste
1 recipe pie crust (see above)
1 egg
1. Preheat oven to 425 F.
2. In a large skillet, heat the oil and briefly saute the zucchini, butternut squash, and onion slices in a single layer on both slices until barely tender. Sprinkle them with a little salt while they're cooking. Cook slices in several batches, if necessary. Remove from the skillet and cool.
3. In the same skillet, adding a little extra oil if necessary, saute the kale until wilted. Season with a little salt and pepper while cooking. When done, remove from the skillet to cool.
4. Remove the pie crust dough from the fridge and roll out on a floured pastry cloth or cheet of wax paper. Transfer the dough to a baking sheet.
5. Layer the slices of zucchini, butternut squash, and onions, slightly overlapping each other in the center of the dough, leaving about 2" of dough all the way around. Mix in the wilted kale. Top with a layer of sliced tomatoes.
6. Carefully fold up the edges of the dough. It's fine if the dough pleats a little.
7. Beat the egg in a cup and brush the dough with the beaten egg. Sprinkle a little kosher or large grain salt on the dough, if desired, and back at 425 F for 10 minutes. Lower the heat to 375 F and bake until the crust is golden, above 30-40 minutes longer.
Serve hot, warm, room temperature, or cold. This recipe makes 4 generous servings.
You can sprinkle in any herbs you like when you're arranging the vegetables. You can also sprinkle grated cheese over the vegetables for more protein and flavor.
Don't hesitate to experiment with fillings of your own. It's all good.
Today's bounty included:
From Sage Mountain Farm: Hybrid tomatoes, sweet candy onions, Fingerling potatoes, Rainbow Swiss chard, and garlic.
From Underwood Family Farms: Galia melon, zucchini, Brandywine tomatoes, green cabbage, kale, yellow zucchini, butternut squash, green leaf lettuce, Blue Lake beans, round carrots, golden beets and candy beets.
From Rancho Santa Cecilia: Hass avocados and lemons.
And from Silver Lake Farms: mustard and arugula microgreens.
Enjoy!
Shelley
Friday, September 30, 2011
Fingerling Potato Salad
Potato salad is like a blank slate. There are so many flavors that work well with potatoes, there are literally hundreds of variations on this classic dish.
Let's start with the potatoes: Fingerlings retain their shape, while Russets are inclined to break apart resulting in a creamier texture. However, you can mash the Fingerlings a little and end up with exactly the amount of potato chunky-ness you prefer. Redskins are more like Fingerlings in that they retain their shape, but they mash up well too.
I like to leave the potatoes in their jackets because it provides a little more nutrition and fiber. I also like the look of it. But if you want to peel your potatoes, I suggest doing so after you cook them. You'll find it easier to remove their papery skins. Wait until they're cool enough to handle, though.
As for additions, a classic version of potato salad includes chopped celery, chopped onion, mashed hard-boiled eggs, sweet pickle relish, and of course, mayonnaise. However, you can add peppers, both sweet and/or hot, fresh English peas (in season), fresh corn kernels, grated carrots, grated zucchini, or chopped kale. And you don't have to use a mayo-based dressing. Vinaigrettes are lovely on potato salad.
Salt, pepper, and paprika are classic seasonings. But you can get adventurous and season your potato salad with cumin or curry powder. I adore smoked paprika, both sweet and hot. Lemon juice and/or grated lemon peel will add a little zing. For even more zing, try Dijon mustard, horseradish, or wasabi.
I made my potato salad today with the Fingerlings in our box, as well as sweet onion, red onion, grated carrots, chopped celery, pickle relish, and mayo. Here's my recipe, but don't hesitate to try your own variations. Potato salad is such a popular dish at my house, I'm sure I'll be postiong more variations in the future.
1 lb. Fingerling potatoes
1/2 small sweet onion, finely chopped
1-2 T finely chopped red onion
1-2 ribs celery, trimmed and chopped
2 carrots, peeled and grated
1-2 T sweet pickle relish, or dill relish, if you prefer
4 T mayonnaise, or more to taste
salt, pepper and paprika to taste
1. Scrub the potatoes. Put in a pot with water to cover. Bring to a boil and simmer, covered, until potatoes are just tender. The cooking time will vary with the size of the potatoes.
2. While the potatoes are cooking, place the chopped onions, celery, grated carrots and relish in a large bowl.
3. When the potatoes are done, drain them and allow them to cool. When they're cool enough to handle, remove the skins, if desired.
4. Cut the cooked and cooled potatoes into small chunks. For a slightly creamier texture, use a potato masher to mash the potatoes lightly.
5. Stir in the mayo. Add more, if desired. Season with salt, pepper, and paprika to taste.
Potato salad tastes even better after a few hours of refrigeration, so it's a great make-ahead dish.
Today's bounty included:
From Underwood Family Farms: Artichokes, Cherokee tomatoes, green bell peppers, jalapenos, yellow carrots, yellow wax beans, bi-color corn, Romaine lettuce, and yellow summer squash.
From Sage Mountain Farm: Hybrid tomatoes, eggplant, sweet candy onions, zucchini, Fingerling potatoes, and melons.
From Silver Lake Farms: cilantro, arugula, and mustard microgreens, lemons, and sunflower seedlings.
Enjoy!
Shelley
Labels:
carrots,
Fingerling potatoes,
sweet onion
Friday, September 23, 2011
Massaged Kale Salad
Jennie Cook, a local caterer who catered our July 4, 2010 party for the Food & Flowers Freedom Act, recently introduced me to Massaged Kale Salad. What a revelation it was! By simply spending a few minutes literally playing with your food, you can create an amazingly delicious raw kale salad which serves as a blank slate for any number of additional ingredients.
A little crumbled blue cheese, toasted walnuts, and diced fresh apple or pear adds up to one tasty version. Vegans might prefer chopped sun-dried tomatoes and toasted pine nuts. Sprinkle in a bit of garam masala and toss in peeled and sliced mango and a handful of raisins and you've got something with Indian flavors. Whatever you decide to do, it won't take more than a few minutes to pull the whole salad together.My recipe uses another of today's CSA bounty - grapes.
Their sweetness is a nice counterpoint to the tartness of the lemon juice and the slight bitterness of the kale.
1 bunch kale (6 large leaves or more)
2 t extra virgin olive oil
scant 1/2 t salt
1 generous t lemon juice
1/2 C halved grapes, or more to taste
3-4 T shelled toasted pistachio nuts
pepper to taste
1. Wash and dry the kale leaves. Remove the leaves from the stalks. Slice the leaves crosswise in approximately 1/2 inch pieces. [This is called a chiffonade.] Compost the stems.
2. Turn the kale leaves into a large bowl. Add the olive oil, salt, and lemon juice. With clean hands, gently massage the salt, oil, and juice into the kale leaves for 1-3 minutes, until the kale is approximately half the volume it started out. You can massage a little more or less to your taste.
3. Toss in the sliced grapes and nuts. Grate in a little fresh pepper. Add the salt, if necessary.
That's it! You can add a little crumbled goat cheese if you'd like. This recipe makes 2 very generous servings or 4 smaller ones.
Today's bounty included:
From Underwood Family Farms: Romaine and red leaf lettuce, red and purple bell peppers, Brandywine tomatoes, green cabbage, bi-color corn, kale, Easter radishes, Galia melons, round carrots, and raspberries.
From Sage Mountain Farm: Cucumbers, collard greens, Cherry Belle radishes, heirloom melons, and mixed heirloom tomatoes.
From Sweet Tree Farm: Red Flame grapes, white nectarines, and yellow peaches.
And from Silver Lake Farms: Mustard and basil microgreens.
Enjoy!
Shelley
Friday, September 16, 2011
Cheese-y Stuffed Summer Squash
I love the patty pan squash we've been getting lately. It's so pretty, I hate to cut it up and ruin its attractive scalloped edge. If I must cut it, I prefer to slice it crosswise, that way at least some of the slices retain their distinctive scallop.
This recipe is great because the squash is kept whole, maintaining its lovely shape. The squash is scooped out, stuffed and cooked until tender. While the recipe may sound complicated, it's really quite easy and the finished dish looks like something special.
I like the combination of vegetables in the recipe below, but one of the wonderful features of stuffing is you can add whatever you like. Vegans can replace the cheese with quinoa or bulgher; carnivores might like to include a little crumbled bacon, sausage, or chorizo. Whatever your tastes, I encourage you to try this delicious recipe with patty pan squash or any other summer squash such as zucchini.
Cheese-y Stuffed Summer Squash
2 medium patty pan squash
1 T butter
2-3 T chopped red onion
3-4 leaves finely chopped chard
1/4 C chopped shiitake mushrooms
1/4 C grated cheddar or jack cheese
salt and pepper to taste
1. Preheat oven to 400 degree. Wash and dry the squash.
2. Using a sharp knife, slice a very small piece (crosswise) off the rounded bottom of the squash so that it is stable when standing. Then, with the squash standing, using a melon baller or a small ice cream scoop, cut into the top of the squash and scoop out the flesh (and seeds) leaving about 1/2 inch along the sides and bottom.
3. Finely chop the squash flesh that you've removed. There's no need to peel the skin. However, you may want to cut away and compost any tough stems.
4. Place the hollowed out squash in a small saucepan, bottoms down. Fill with about 1 inch of water. Cover and bring to a low boil over medium heat. Cook the squash in the covered pan until barely tender, about 3-5 minutes. Remove from pan and set aside.
5. While the squash is cooking, melt the butter in a small skillet. Add the onions and saute over medium heat for 1-2 minutes. Add the chopped squash flesh and saute 1 minute. Add the chopped chard and shiitake mushrooms and saute until tender and dry.
6. Spoon the cooked vegetables into a small mixing bowl and add the grated cheese and salt and pepper to taste. Stir until the cheese is well combined. It's fine with the grated cheese melts from the heat of the cooked vegetables.
7. Divide the stuffing into two portions and spoon it into the hollowed out, parboiled squash, mounding it into a nicely rounded top.
8. Place the stuffed squash on a slightly greased, small cookie sheet and place in the hot oven. Bake until the top is well-browned, about 10 minutes. Serve whole, or using a sharp knife, slice in half lengthwise.
If you'd like, you can season the stuffing with a little sage or oregano. A little parsley is also nice.
Today's bounty included:
From Underwood Family Farms: bi-color corn, Blue Lake green beans, golden beets, Japanese turnips, green bell peppers, chard, Valencia oranges, patty pan squash, red and green leaf lettuce, and Orange Gem tomatoes.
From Sage Mountain Farm: heirloom melons, white carrots, cucumber, collard greens, garlic, and hybrid tomatoes.
And from Silver Lake Farms: parsley, cilantro, arugula, and mustard microgreens.
Enjoy,
Shelley
Labels:
chard,
onion,
shiitake mushrooms,
summer squash
Friday, September 9, 2011
Baba Ghanouj
I love eggplant. It's shiny blackish purple skin and curvaceous shape are enticing enough. But its delicate flavor and super creamy texture make it a wonderfully versatile vegetable.
Eggplant is delicious simply sliced and grilled, then brushed with a little balsamic vinaigrette. Prepared this way, it makes a great veggie sandwich with some roasted red pepper, red onion, a little arugula and goat cheese. Eggplant is great in stews such as Ratatouille as well as in layered casseroles such as Eggplant Parmesan and Moussaka.
Today's recipe for Baba Ghanouj is a delicious and easy eggplant and tahini dip. It's wonderful served with fresh pita bread or chips. You can also eat it in a sandwich. Try spreading a thick layer of Baba Ghanouj on whole wheat bread or in a pita pocket. Add sliced tomato, a few cucumber slices, thinly sliced red onion, and some microgreens or sprouts for a tasty meal.
Baba Ghanouj
1 1 lb eggplant
1-2 cloves fresh garlic, chopped and pounded to a coarse paste
4-5 T fresh squeezed lemon juice
2-3 T tahini (sesame paste)
1-2 T extra virgin olive oil
1 t salt, or to taste
1/4 t pepper, or to taste
2-4 T chopped fresh cilantro or Italian parsley
1. Preheat oven to 350 F.
2. Using the tines of a fork, prick the skin of eggplant in a couple of places. Place on a baking sheet and roast the whole eggplant in the oven until it is very soft. About 45 minutes. Set aside to cool. [If you're firing up the grill, roasting the eggplant on the grill is a delicious alternative.]
3. When the eggplant is cool enough to handle, cut it in half and scoop out the soft flesh into a bowl. Compost the peel.
4. In a food processor, or with a fork, mash the eggplant until smooth. If you prefer to have your eggplant a little chunky, that's fine, too.
5. Stir in (or process in) all of the remaining ingredients. Stir until well-combined and smooth.
6. Adjust the seasoning. Add more lemon juice ir tahini, if you prefer. Refrigerate until ready to serve.
I like to use a food mill for step 3 as it grinds the eggplant to a coarse texture, but food mills aren't common kitchen utensils anymore. If you have one, do try it with this recipe.
Using roasted garlic instead of fresh garlic is a nice way to mellow out the strong garlic flavor of this dish. Sometimes I like to add some smoked paprika, too.
You can find tahini in the Middle Eastern section of most markets. If yours doesn't carry it, there are dozens of little Armenian markets in Hollywood and Glendale that are very likely to carry tahini.
Today's bounty included:
From Underwood Family Farms: blackberries, Valencia oranges, romaine, red leaf lettuce, carrots, Cherokee heirloom tomatoes, Hass avocados, yellow wax beans, eggplant, bi-color corn, and Blue Lake green beans.
From Sage Mountain Farm: Roma tomatoes, mixed heirloom tomatoes, green scallions, Russian kale, and cucumber.
From Sweet Tree Farm: Nectarines and pluots.
From Weiser Family Farms: French Fingerling potatoes.
And from Silver Lake Farms: Basil, arugula, and mustard microgreens.
Enjoy!
Shelley
Friday, September 2, 2011
Roasted Tomatillo Salsa
Tomatillos are making their first appearance in our box this week; and if you've never had them, you're in for a treat. These pleasingly tart fruits make a wonderful salsa that's great with chips and as a condiment for grilled fish or meat. I like to serve it with carne asada, grilled chicken, and grilled salmon or mahi mahi. It's also wonderful with all kinds of Mexican foods such as tamales, enchiladas, chiles rellenos, and taco
I like to roast a couple of serrano peppers for this recipe, but I don't always use both of them. Unless you really like it hot, start with about 1/2 serrano pepper when you mix up the salsa. Then add more to your taste until you achieve the desired level of hotness.
1 lb tomatillos
1 medium onion
2 serrano peppers
1 T olive oil
1 bunch cilantro (about 1 C loosely packed leaves)
salt and pepper to taste
1. Preheat oven to 350.
2. Remove the papery skins from the tomatillos and set aside for the compost. Wash and dry the tomatillos and place them whole in a large bowl.
3. Remove the papery skin from the onion and set aside for the compost. Quarter the onion and place in the bowl the the tomatillo.
4. Wash and dry 2 serrano peppers. Add to the bowl.
5. Drizzle olive oil over vegetables and turn out onto a baking sheet. Bake at 350 for about 30 minutes until the skins of the tomatillos are slightly blistered and the edges of the onions are slightly browned.
6. Remove from the oven and cool for 10 minutes.
7. Place the roasted tomatillos, onions, and about 1/2 serrano pepper in a blender or food processor and process for about 15-20 seconds. Taste and process in more serrano pepper, if desired. Then add cilantro and process until salsa gets to the desired thickness.
8. Season with salt and pepper to taste. Serve or store in the fridge.
If you're firing up the grill, you can roast the tomatillos, onions, and serranos in a grill pan over a charcoal or gas flame. In fact, I think it's even better this way. But the oven is fine, too.
Today's bounty included:
From Underwood Family Farms: Seedless yellow watermelon, red leaf lettuce, green romaine lettuce, golden beets, Easter radishes, Brandywine heirloom tomato, bi-color corn, Blue Lake green beans, summer squash, yellow bell pepper, and Hass avocado.
From Sage Mountain Farms: tomatillos, green scallions, Cherry Belle radishes, Russian kale and mixed heirloom tomatoes.
From Sweet Trees Farms: White nectarines and pluots.
From Silver Lake Farms: arugula, basil and mustard microgreens.
And lemons from the garden of Silver Lake Farms farmhand, Susie.
Enjoy!
Shelley
Labels:
cilantro,
green onion,
serrano chilis,
tomatillos
Monday, August 29, 2011
Stone Fruit
Here's a friendly reminder to treat your stone fruit with care. The fruit from Sweet Tree Farms is ripe when we pick it up on Fridays. You might want to bring a separate bag for your fruit so that they don't get bruised on the way home.
Friday, August 26, 2011
Slow-Cooked String Beans with Tomato and Onion
These days most people eat their vegetables on the crunchy side. If not entirely raw, they're usually minimally cooked. While some vegetables are certainly best when they're cooked lightly, other vegetables can withstand longer cooking, and string beans are one of those vegetables. In fact, string beans are so versatile you find them in salads, soups, and stews; and of course as a side dish.
This is one of my favorite ways to prepare string beans as a side dish. The lovely Blue Lake beans that were in our box today are delicious prepared this way. It's also a great way to use the tougher wide beans that are best well-cooked.
2-3 T olive oil
1 medium red or brown onion
1 lb string beans
1 C chopped red tomato
1 T dried oregano or 2 T chopped fresh oregano
salt and pepper to taste
1. Heat olive oil over medium heat in a large skillet with a lid.
2. Cut onion in half lengthwise and the cut lengthwise into strips. Add to skill and saute, stirring periodically, until translucent.
3. Trim the ends off the string beans and pull off any tough strings, but leave beans whole. Add beans to skillet and stir to coat with oil. Cook over medium-low heat, partially covered for about 10-15 minutes, stirring occasionally. Allow both the onions and the beans to get a little browned.
4. Stir in the chopped tomatoes and chopped oregano. Continue cooking, uncovered, until most of the liquid from the tomatoes has evaporated, usually another 5-10 minutes.
5. Turn heat down. Season with salt and pepper to taste. Cover and keep warm until ready to serve.
Today's bounty included:
From Underwood Family Farms: Yellow zucchini, bi-color corn, raspberries, eggplant, Hungarian bell pepper, red and green leaf lettuce, Blue Lake beans, Texas sweet onion, and chard.
From Sage Mountain Farm: yellow patty pan squash, cucumbers, Easter Egg radishes, Chantennay carrots, green scallions, and collard greens.
From Sweet Tree Farms: white nectarines, pluots, and heirloom tomatoes.
And from Silver Lake Farms: arugula, cilantro and mustard microgreens.
Enjoy!
Shelley
Friday, August 19, 2011
Spaghetti alla Checca
I was inspired today by the fabulous basil microgreens from Silver Lake Farms and the amazing assortment of tomatoes in our box. Spaghetti alla Checca is a simple and delicious way to use late summer's abundance of tomatoes. This dish is made with just a few ingredients, so use the very best olive oil, garlic, basil, tomatoes, and pasta you can find. I used red tomatoes, but you can use any color fresh, ripe tomatoes.
Spaghetti works well in this dish, but you can substitute many other pasta shapes. Farfalle work nicely, as do linguine and angel hair.
Spaghetti alla Checca
Assemble the following ingredients:
1 lb dry spaghetti
4-6 T extra virgin olive oil
3-4 cloves garlic, chopped
1 lb fresh tomatoes, chopped
handful of basil microgreens or 1/4 C fresh basil, chopped
salt and pepper
grated parmesan cheese, optional
1. Bring a large pot of salted water to a boil and cook the spaghetti 1 minute less than the package directions indicate.
2. While the pasta is cooking, heat the olive oil in a large skillet. Add the garlic and cook until aromatic and slightly golden. [If the pasta isn't done yet, turn off the heat until the pasta is ready. Turn the heat on again before adding the pasta in Step 4 below.]
3. Just before draining the pasta, remove about 1/2 C of the pasta cooking water and set it aside.
4. Drain the pasta and add it and the pasta water to the skillet with the garlic. Cook on medium heat until, stirring to coat the pasta, until the water is gone. Add the chopped tomatoes and stir to distribute.
5. Remove from the heat and season with salt and pepper to taste. Then stir in the basil microgreens or chopped fresh basil. Garnish with microgreens and serve warm or at room temperature.
Today's bounty included:
From Underwood Family Farms: yellow and green sweet bell peppers, red and green leaf lettuce, Japanese turnips, mizuna, bok choy, sharlyn and ambrosia melons, avocado, zucchini, Cherokee tomatoes, garlic, and collard greens.
From Sage Mountain Farm: Easter radishes, patty pan squash, heirloom tomatoes, and Swiss chard.
From Sweet Tree Farms: Peaches, pluots, and heirloom tomatoes.
And from Silver Lake Farms: Basil and mustard microgreens and sweet green sherry tomatoes.
Enjoy!
Shelley
Labels:
basil microgreens,
garlic,
heirloom tomatoes
Friday, August 5, 2011
Heirloom Tomato and Fresh Mozzarella Bruschetta
If you love tomatoes like I do, this is your time of year. It's peak tomato season and gardens and farms are brimming with this glorious fruit.
I've been putting up quarts of my slow-cooked tomato sauce (see blog post for September 24, 2010 for this recipe) and eating juicy, fresh tomatoes every day. There's nothing like a fresh-picked, vine-ripened heirloom for great tomato flavor and texture.
Here's another bread and tomato combination that's very easy. Many bruschetta recipes call for chopped tomatoes, but this recipe uses sliced tomatoes. It saves you a step and I think it's easier to eat, too; you don't have all those tomato pieces falling off the bread.
Grilling the bread adds a wonderful flavor component, but you can toast the bread on a cookie sheet or rack in your oven, if you don't feel like grilling.
Heirloom Tomato and Fresh Mozzarella Bruschetta
12 1/2-inch slices of a hearty, round baguette
2-3 T olive oil
Pre-heat the grill or oven (to about 350 degrees, if using an oven). Brush the bread slices with olive oil on both sides. Grill until lightly browned on one side, then turn over and grill on the other side. You can do this step ahead, but it's best to use the grilled bread the same day that you grill it.
12 1/2-inch slices ripe heirloom tomato about the same diameter as the bread slices
12 slices fresh mozzarella a little smaller than the tomato and bread slices
sea salt
handful of Silver Lake Farms microgreens
Place a slice of tomato atop the grilled bread. Sprinkle with a little sea salt. Top with mozzarella and a small bunch of microgreens. Serve immediately or set aside for an hour or two to allow the tomato juices to soak into the grilled bread.
Occasionally, I like to substitute burrata for the fresh mozzarella. And you can use finely chopped basil instead of microgreens, if you prefer.
Today's bounty included: Green leaf lettuce, red chard, corn, green beans, pluots, nectarines, raspberries, French morning melon, arugula shoots and heirloom tomatoes.
Enjoy!
Shelley
Friday, July 29, 2011
Pappa di Pomodoro
There are so many delicious ways to combine tomatoes and bread; and Pappa di Pomodoro, or Tuscan tomato soup, is one of them. This soup is so easy to make and it's a great way to use tasty summer tomatoes and stale bread. A hearty wheat bread, like Mark Stambler's pagnol loaves, do best in this recipe. Avoid any bread that's too soft or spongy. If you don't have any stale bread, coarsely chop up fresh bread into cubes and toast in a 350 degree oven for 10 minutes.
2-3 cloves garlic, finely chopped
1/4 c extra virgin olive oil
4 C chopped red tomatoes
4 T chopped fresh basil
3-4 C vegetable or chicken stock
3-4 C cubed stales bread
2-4 T grated parmesan cheese
salt and pepper to taste
1. Heat the oil in a soup pot and saute the garlic until golden and aromatic, being careful not to burn the garlic.
2. Add the tomatoes and basil and cook for 10 minutes over medium heat.
3. Add the bread. Bring to boil. Turn down the heat and simmer covered for 30-40 minutes.
4. Stir in the parmesan cheese. Season with salt and pepper. Ladle into bowls and drizzle with a little bit of olive oil before serving.
Today's bounty included the following:
From Underwood Family Farms: Bi-color corn, green bell peppers, purple bell peppers, Hungarian bell peppers, bok choy, mizuna, yellow seedless watermelon, cucumbers, and summer squash.
From Sage Mountain Farm: Asian heirloom radishes, purple scallions, organic garlic, yellow carrots, arugula, broccoli florets, and zucchini.
From Sweet Tree Farms: nectarines, peaches, and heirloom tomatoes.
Also, goat cheese from Drake Family Farms and arugula and mustard microgreens from Silver Lake Farms.
Enjoy!
Shelley
Friday, July 22, 2011
Peach and Arugula Salad
It's peak season for stone fruit and we're getting beautiful peaches and nectarines lately. Sinking your teeth into a sweet and juicy ripe peach is one of summer's great pleasures. Sweet, ripe peaches can also star in a lovely light summer salad; and practically all of the ingredients for this salad were in today's box.
1 bunch arugula
1/2 - 1 C microgreens
1-2 peaches
1-2 T thinly sliced sweet or red onion
2 T toasted walnuts or pecans
1-2 T extra virgin olive oil
1-2 T balsamic vinegar
1/4 - 1/2 C crumbled goat cheese
salt and pepper
1. Wash and dry the arugula and microgreens. Trim off the tough stems from the arugula and break into bite-sized pieces. Put the arugula and microgreens in a large bowl.
2. Halve the peach(es) lengthwise. Remove and discard the pit. Slice the peaches lengthwise. Add to the bowl.
3. Add the thinly sliced onion and the nuts. Drizzle the oil and balsamic over the salad and toss to coat. Season with salt and pepper to taste.
4. Add the crumbled goat cheese and toss again. Serve.
You can substitute blue cheese for the goat cheese, if you'd like. You can also substitute toasted pine nuts for the walnuts. I like to add a little fresh mint to this salad sometimes. It gives it a bright and fresh taste.
If you're firing up the grill this weekend. You might try grilling the peaches for this salad. Cut them in half. Rub with a little olive oil and grill, cut side down for a few minutes. Cool before slicing for the salad.
Today's bounty included:
From Underwood Family Farms: Ofelia eggplants, heirloom crookneck squash, Valencia oranges, romaine lettuce, arugula, spring onions, French breakfast radishes, jalapeno, broccoli florets, and yellow carrots.
From Sage Mountain Farm: yellow zucchini, yellow wax beans, green bell pepper, Hungarian pepper, bi-color corn, and orange carrots.
From Sweet Tree Farms: peaches, nectarines and mixed heirloom tomatoes (Cherry, Armani Orange, Red Zebra and Purple Russian).
And arugula and mustard microgreens from Silver Lake Farms.
Enjoy!
Shelley
Friday, July 15, 2011
24 Carat Cake
Carrots are such a versatile vegetable. They can be used in sweet as well as savory recipes. They're wonderful either raw or cooked. They can be chopped, sliced, grated, pureed, or eaten whole. They're super nutritious and they keep for quite a while in the fridge.
I like to add grated carrots as a nutritious extender in potato salad, egg salad, tuna salad, and macaroni or pasta salad. Just mix some finely grated carrots into any of these old standards for a healthy dose of color and vitamin A.
On the sweeter side, here's a delicious carrot cake recipe adapted from an old edition of the Farm Journal cookbook that was given to me by a dear friend. This recipe makes a two-layer cake, but you can increase the recipe by 50% and make a spectacular three-layer cake fit for a special event.
24 Carat Cake
1-1/3 C sifted all-purpose flour
1-1/3 t baking powder
1 t baking soda
1 t salt
2 t ground cinnamon
1/2 t nutmeg
1-1/3 C granulated sugar
1 C vegetable oil
3 eggs, lightly beaten
1 C finely grated carrots
2/3 C crushed pineapple, well drained
2 t finely grated orange rind
1/2 C chopped pecans
1/2 C flaked coconut, lighted toasted
1. Preheat oven to 350 degrees.
2. Butter 2 9-inch round cake pans and sprinkle them lightly with flour. Set aside.
3. Sift together the dry ingredients into a large bowl.
4. Add the oil and eggs and beat until well combined.
5. Mix in the remaining ingredients and blend thoroughly.
6. Pour the batter evenly into the 2 prepared pans and bake at 350 for 35-40 minutes until a cake tester or toothpick inserted into the center of the cakes comes out clean .
7. Cool the cakes in their pans for a few minutes. Then run a thin knife around the edge to loosen the cake, if necessary, and turn out the cakes onto a wire rack. Cool completely before frosting between the layers and on the top and sides with cream cheese frosting.
Cream Cheese Frosting: Cream together 1 stick butter with 8 oz cream cheese. Mix in 1 t vanilla. Gradually beat in about 1 lb confectioner's sugar, until frosting is of spreading consistency. If it's a little too thick, add some milk, orange juice, or orange-flavored liqueur. You can also add finely grated orange rind to the frosting.
Going on Vacation? Don't Toss Those Veggies!
Summertime is vacation time for many, and clearing out the refrigerator is a pre-vacation ritual in my house. With our compost pile and our chickens, not much food goes to waste. But between our garden and the CSA, I can still find my refrigerator full of beautiful fresh produce just days before I leave town. Lately, I've taken to figuring out ways I can preserve my fruits and veggies for later use. Here are a few tips you might find helpful if you find yourself in the same situation.
Summer squashes, eggplant, peppers, mushrooms, and leeks can be sliced and sauteed in a little olive oil until just tender. When cool, pack them in freezer containers and freeze. Use them later in soups, stews, or as toppings for pizza. Remember, they've already been cooked, so add them toward the end of cooking. Defrost and pat dry before using as a pizza topping.
Corn kernels can be cut off the cob raw or after lightly steaming the corn. Allow the corn to cool before packing in freezer containers and freezing. Use the corn in corn chowder, corn pudding, soups, and stews.
Tomatoes lose their structural integrity when frozen, but they can still be used for tomato sauce. If you don't have time to make a slow-cooked tomato sauce before you leave, peel the tomatoes and freeze them whole. They'll be just fine for sauce when you return.
Berries can be frozen whole on a cookie sheet, then packed into freezer containers and frozen. They'll be mushy when you defrost them, but they're fine for smoothies and for mixing into yogurt or oatmeal. Or use them to make jam or preserves.
Stone fruit should be pitted, peeled and sliced into sections, then frozen on a cookie sheet and packed just like berries. They'll be mushy, too, when defrosted, so use as you would berries.
Turn fresh herbs into pesto and freeze the pesto. Don't add cheese until you defrost it.
Root veggies keep for weeks in your fridge, so carrots, parsnips, potatoes, onions and the like will probably been fine while you're gone. However, sometimes I chop and cook carrots and parsnips in a little broth or water until very tender. When cool, I puree them until smooth and pack in freezer containers. I'll turn these purees into soups when the weather turns cooler.
Of course, you might be able to take some of your fresh produce with you when you travel. I frequently pick green tomatoes from my garden and let them ripen on my trip. I'll eat them days later when they're ripe with some locally-bought fresh bread.
If you're really pressed for time, just pass along your fresh fruits and veggies to to friends and neighbors. Who wouldn't love to get some of summer's best.
Today's bounty included the following:
From Underwood Family Farms: Romaine lettuce, Blue Lake green beans, bi-color corn, round carrots, summer squash, pickling cukes, Texas sweet onions, and Cherokee heirloom tomatoes.
From Sage Mountain Farm: Arugula, carrots, pattypan squash, collard greens, heirloom purplette onions, and rainbow chard.
From Sweet Tree Farms: Yellow nectarines and plums.
Enjoy!
Shelley
Subscribe to:
Posts (Atom)